- Select “Quickbooks" as the export integration. Do ensure that your Quickbooks Integration is toggled ON under the ‘Integrations’ tab before proceeding.

-
Fill in the respective fields accordingly
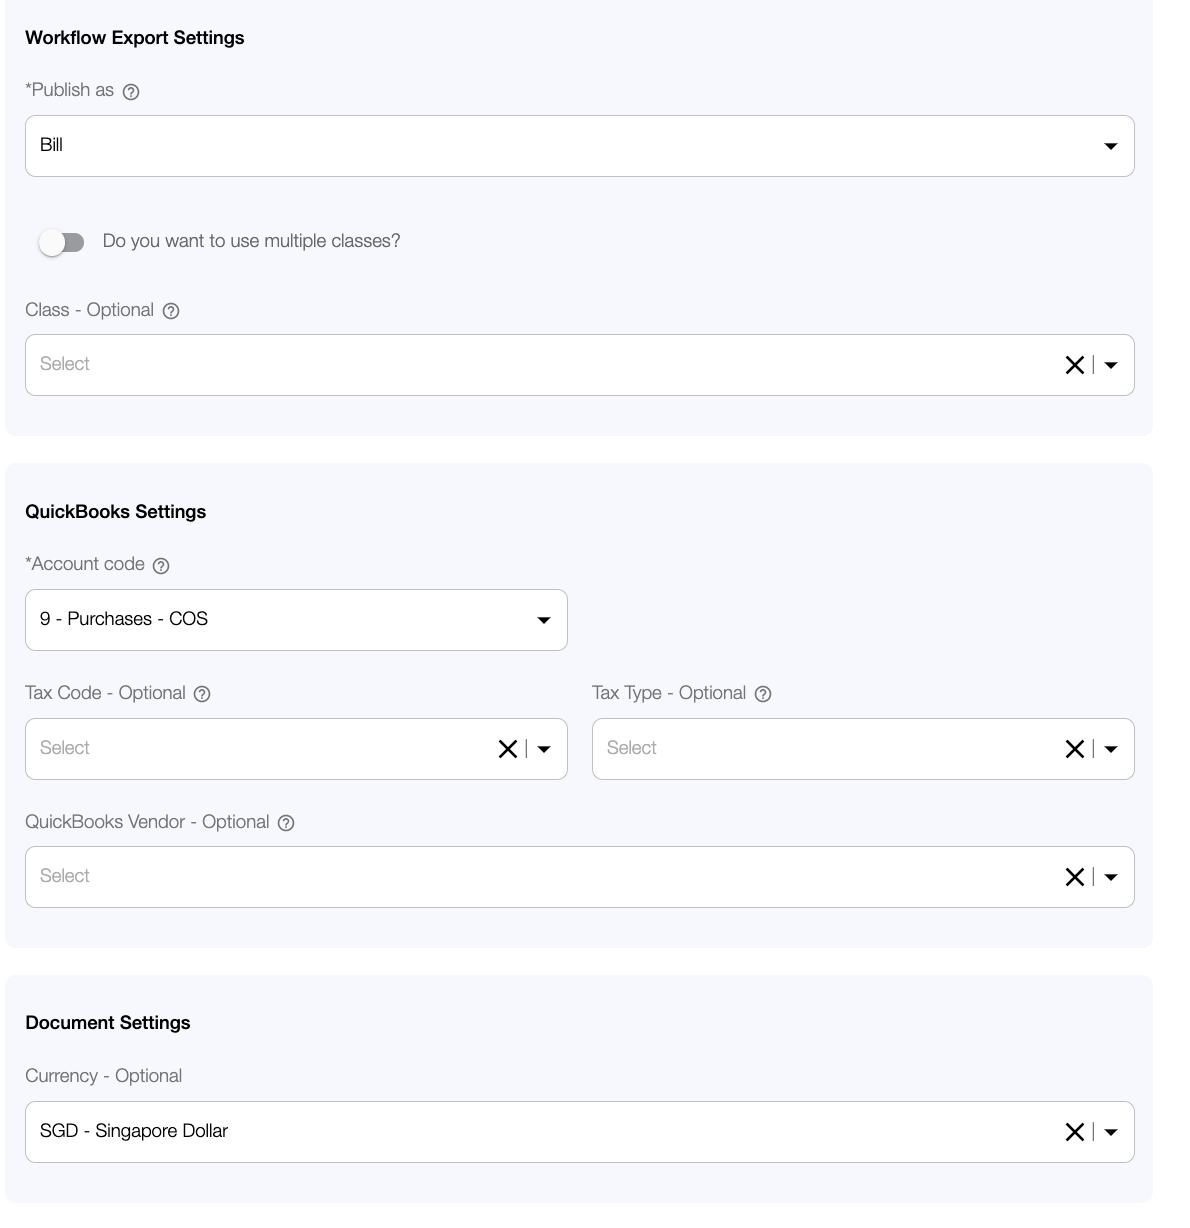
- Workflow Export Settings
- Publish as
- Class - Optional: Allows you to track how different areas of your business (i.e departments, cost centres and locations) are performing. You can also toggle on the “multiple class” function should you require more than one type of tracking in Quickbooks.
- QuickBooks Settings
- Account code
- Tax Code: Depending on the type of document, you may want to indicate the applicable tax rate to apply for the document to be exported. This information will be pulled from your existing set up in Xero if not indicated otherwise.
- Tax Type: This is specific to the document, do confirm if the document includes tax or it is under a separate line item whereby it is excluded from the total amount.
- Quickbooks Vendor
- Document Settings
- Currency
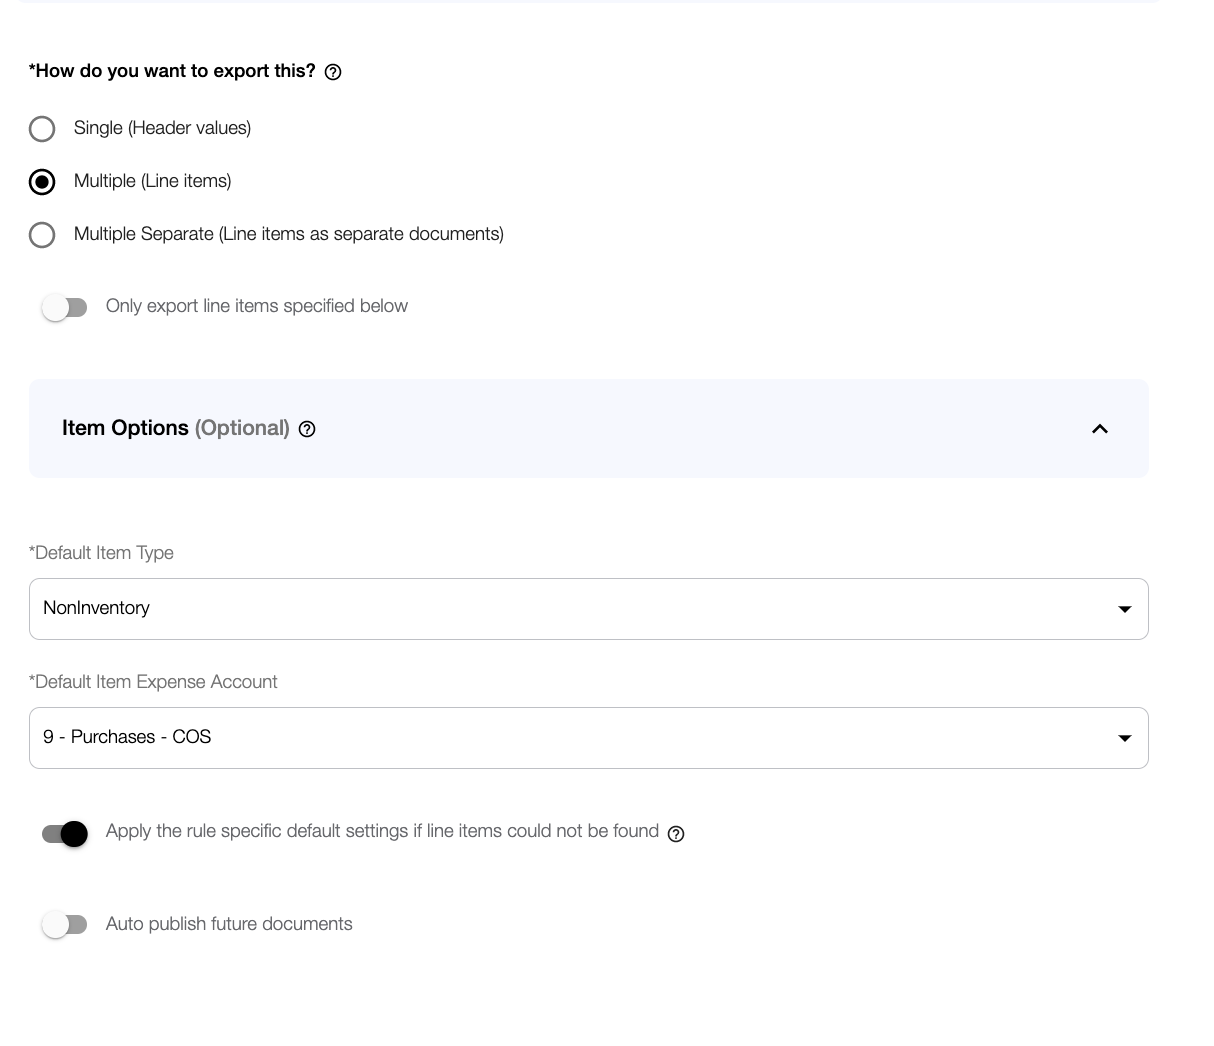
- Type Export
- Single: Only total/header value date is exported
- Multiple: Receive the full output of the line items recognised
- Multiple Separate: Use this option if you want each item to be exported as separate entries in Quickbooks
- Item Options: Create a specific rule for a certain line item, resulting in the general document rule to be overwritten by that particular line item
- Default Item Type
- Default Item Expense Account
- Workflow Export Settings
-
Default Setting - Toggle the "Default Setting" function should you wish to send in entries that are not specified in the item options
Auto Publish - Toggle the “Auto Publish” function should you wish to export subsequent documents that match the same supplier and workflow.