[New] Auto rule creation for Xero is launched!
What does this mean: bluesheets automatically creates your Xero export rules if there is an existing contact and transaction in your connected Xero account.
- If there is an existing contact and transaction, we will automatically create the rule for you to export easily.
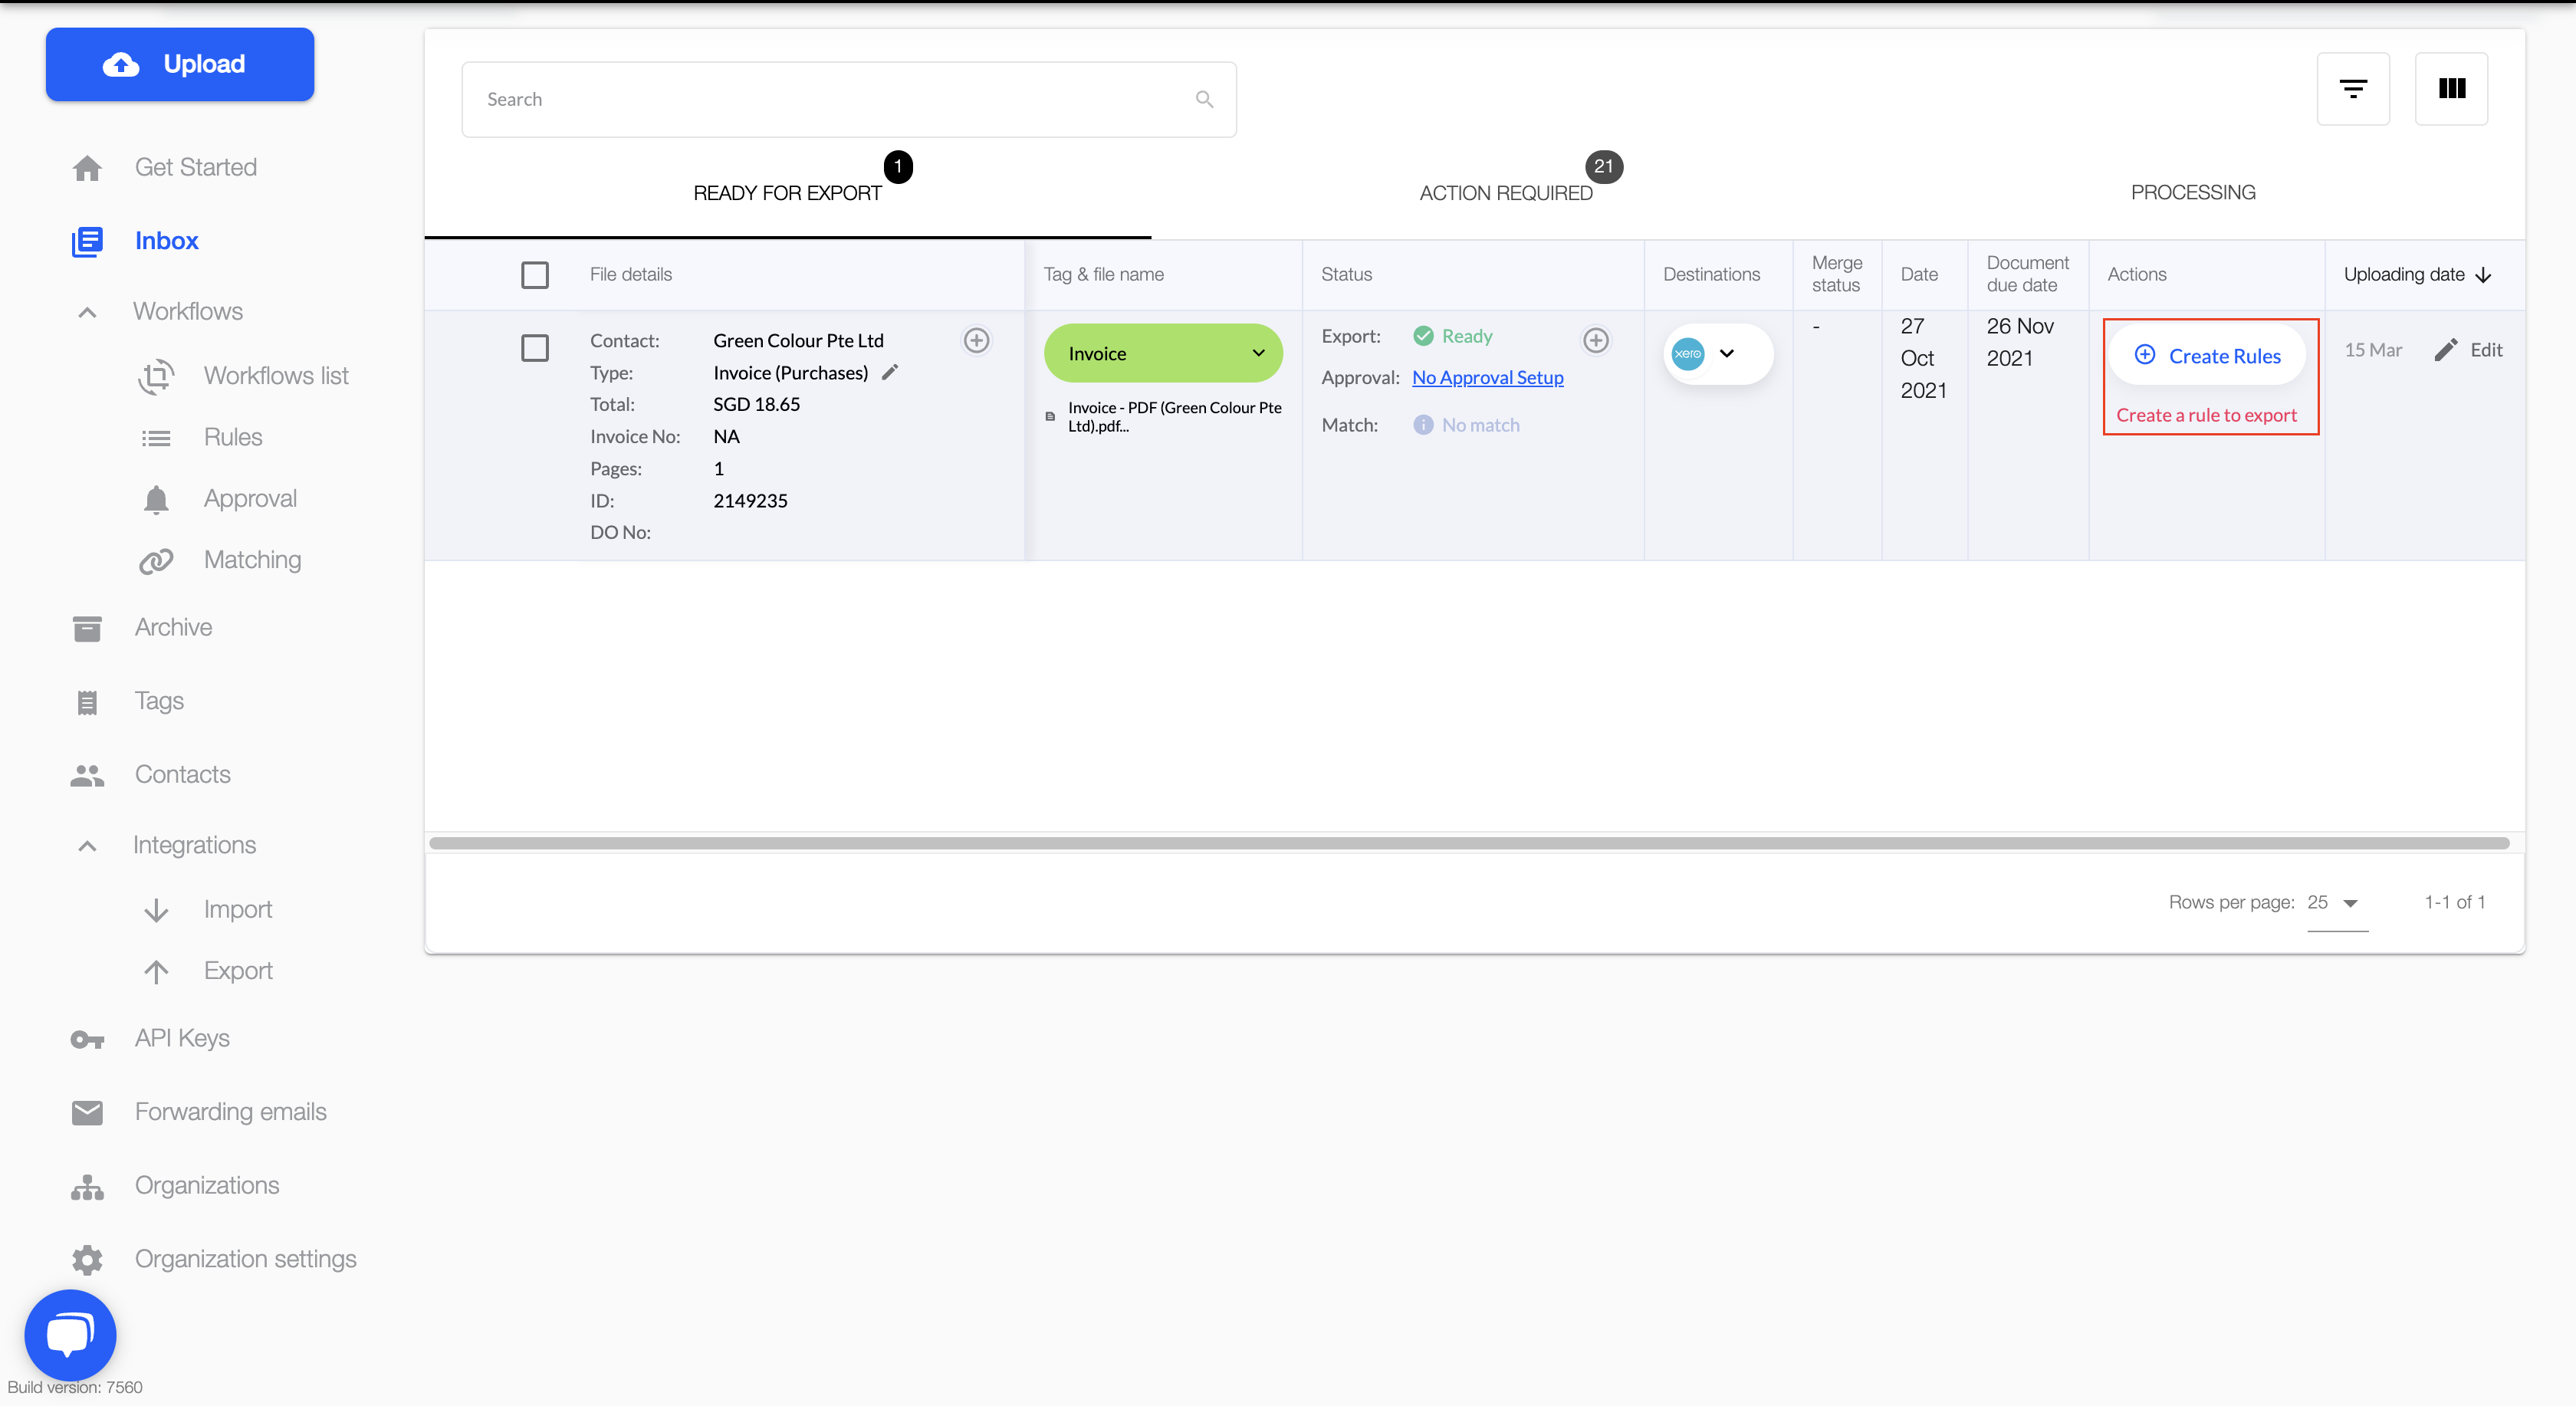
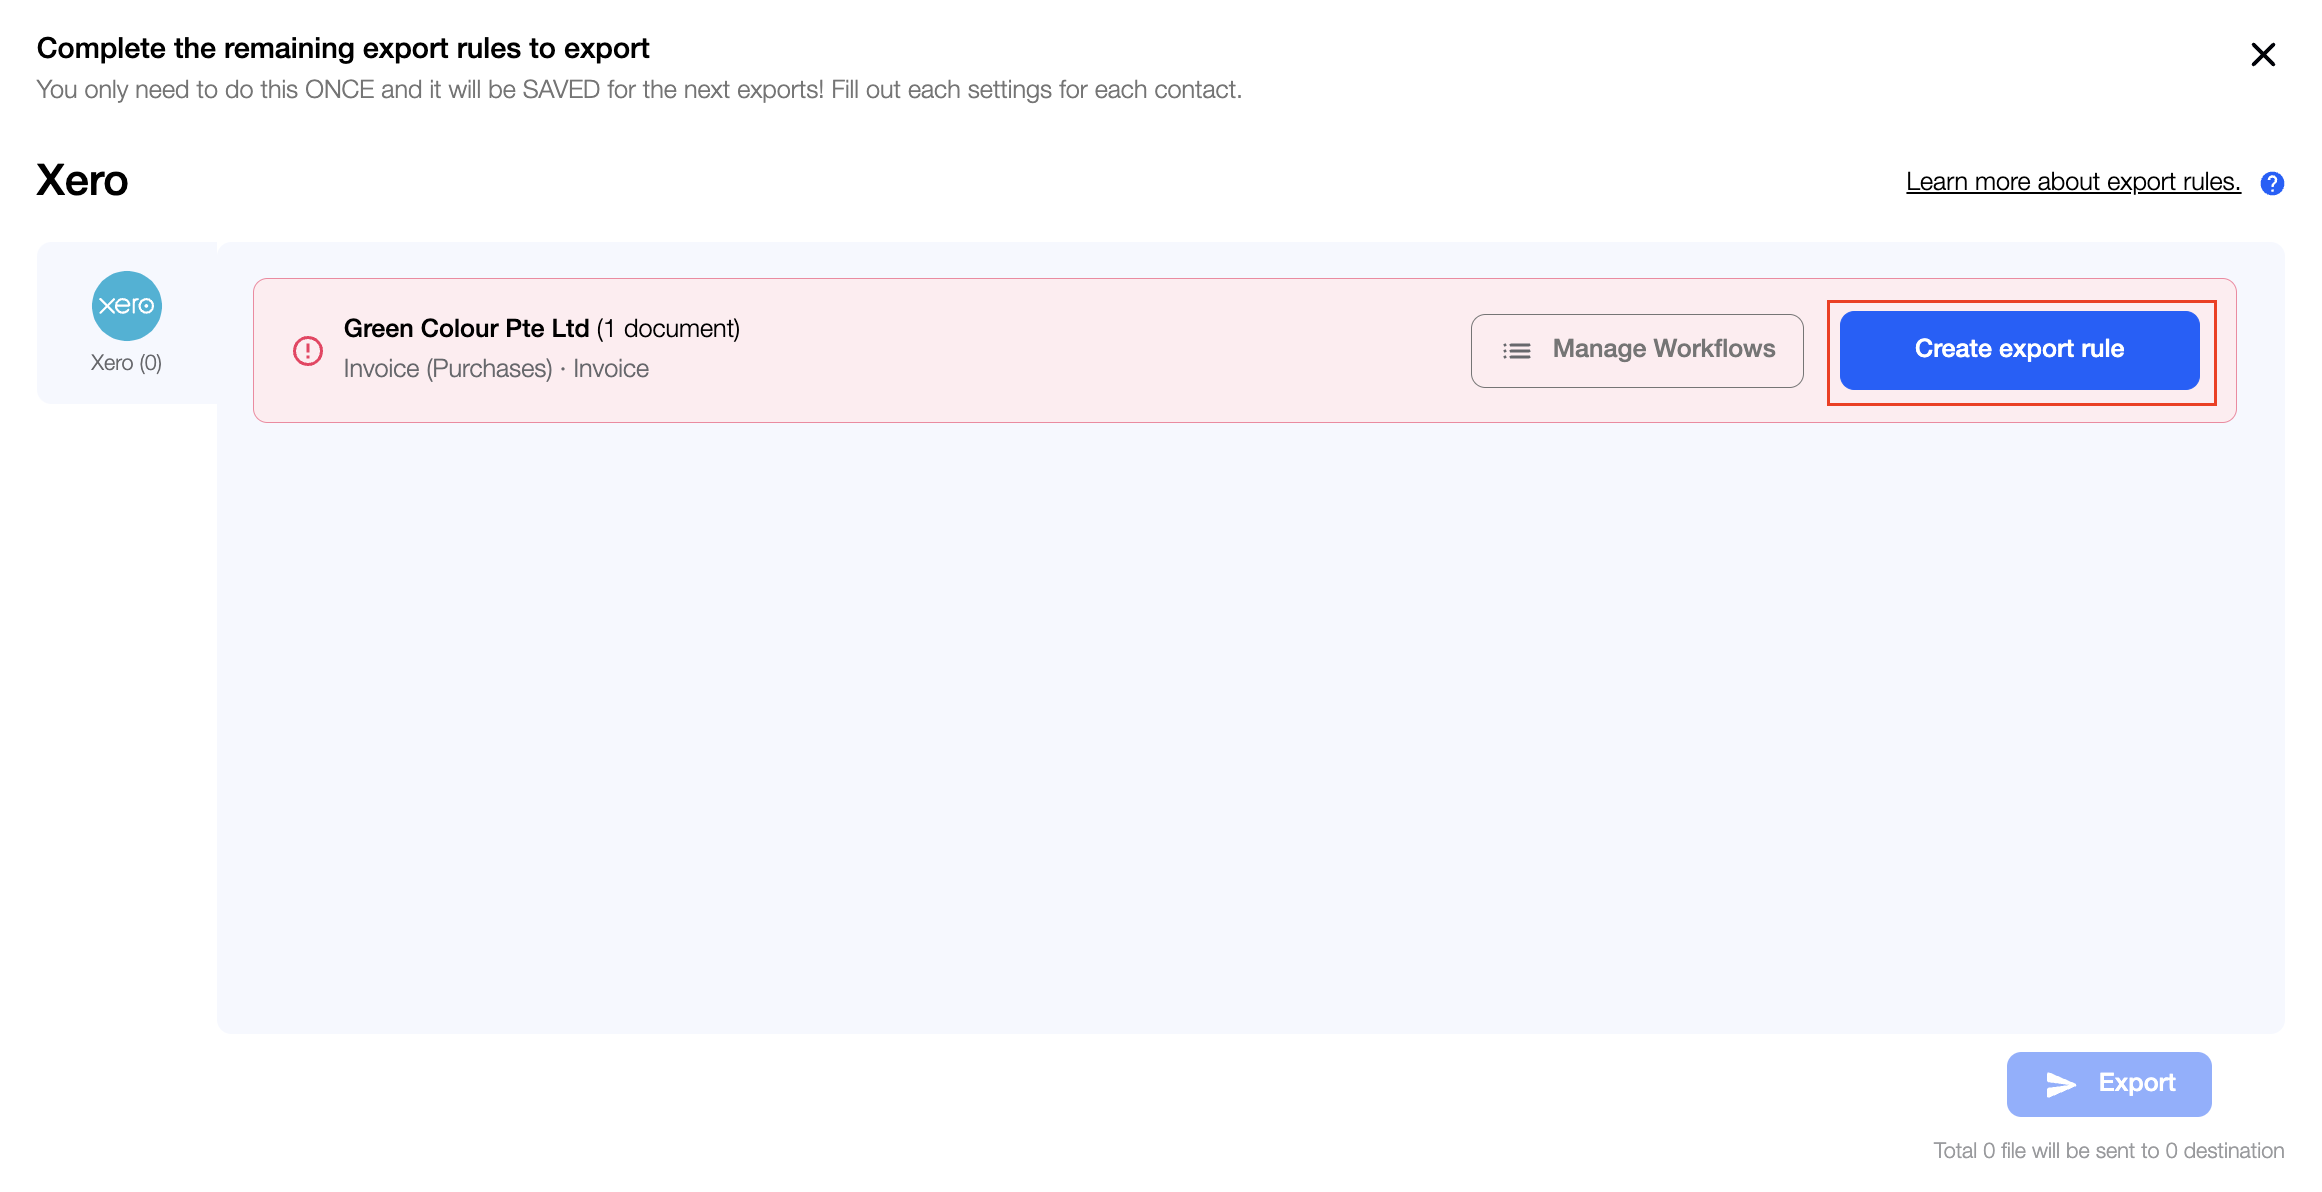
- If there is no existing contact and transaction, bluesheets will prompt you to create the rule manually.
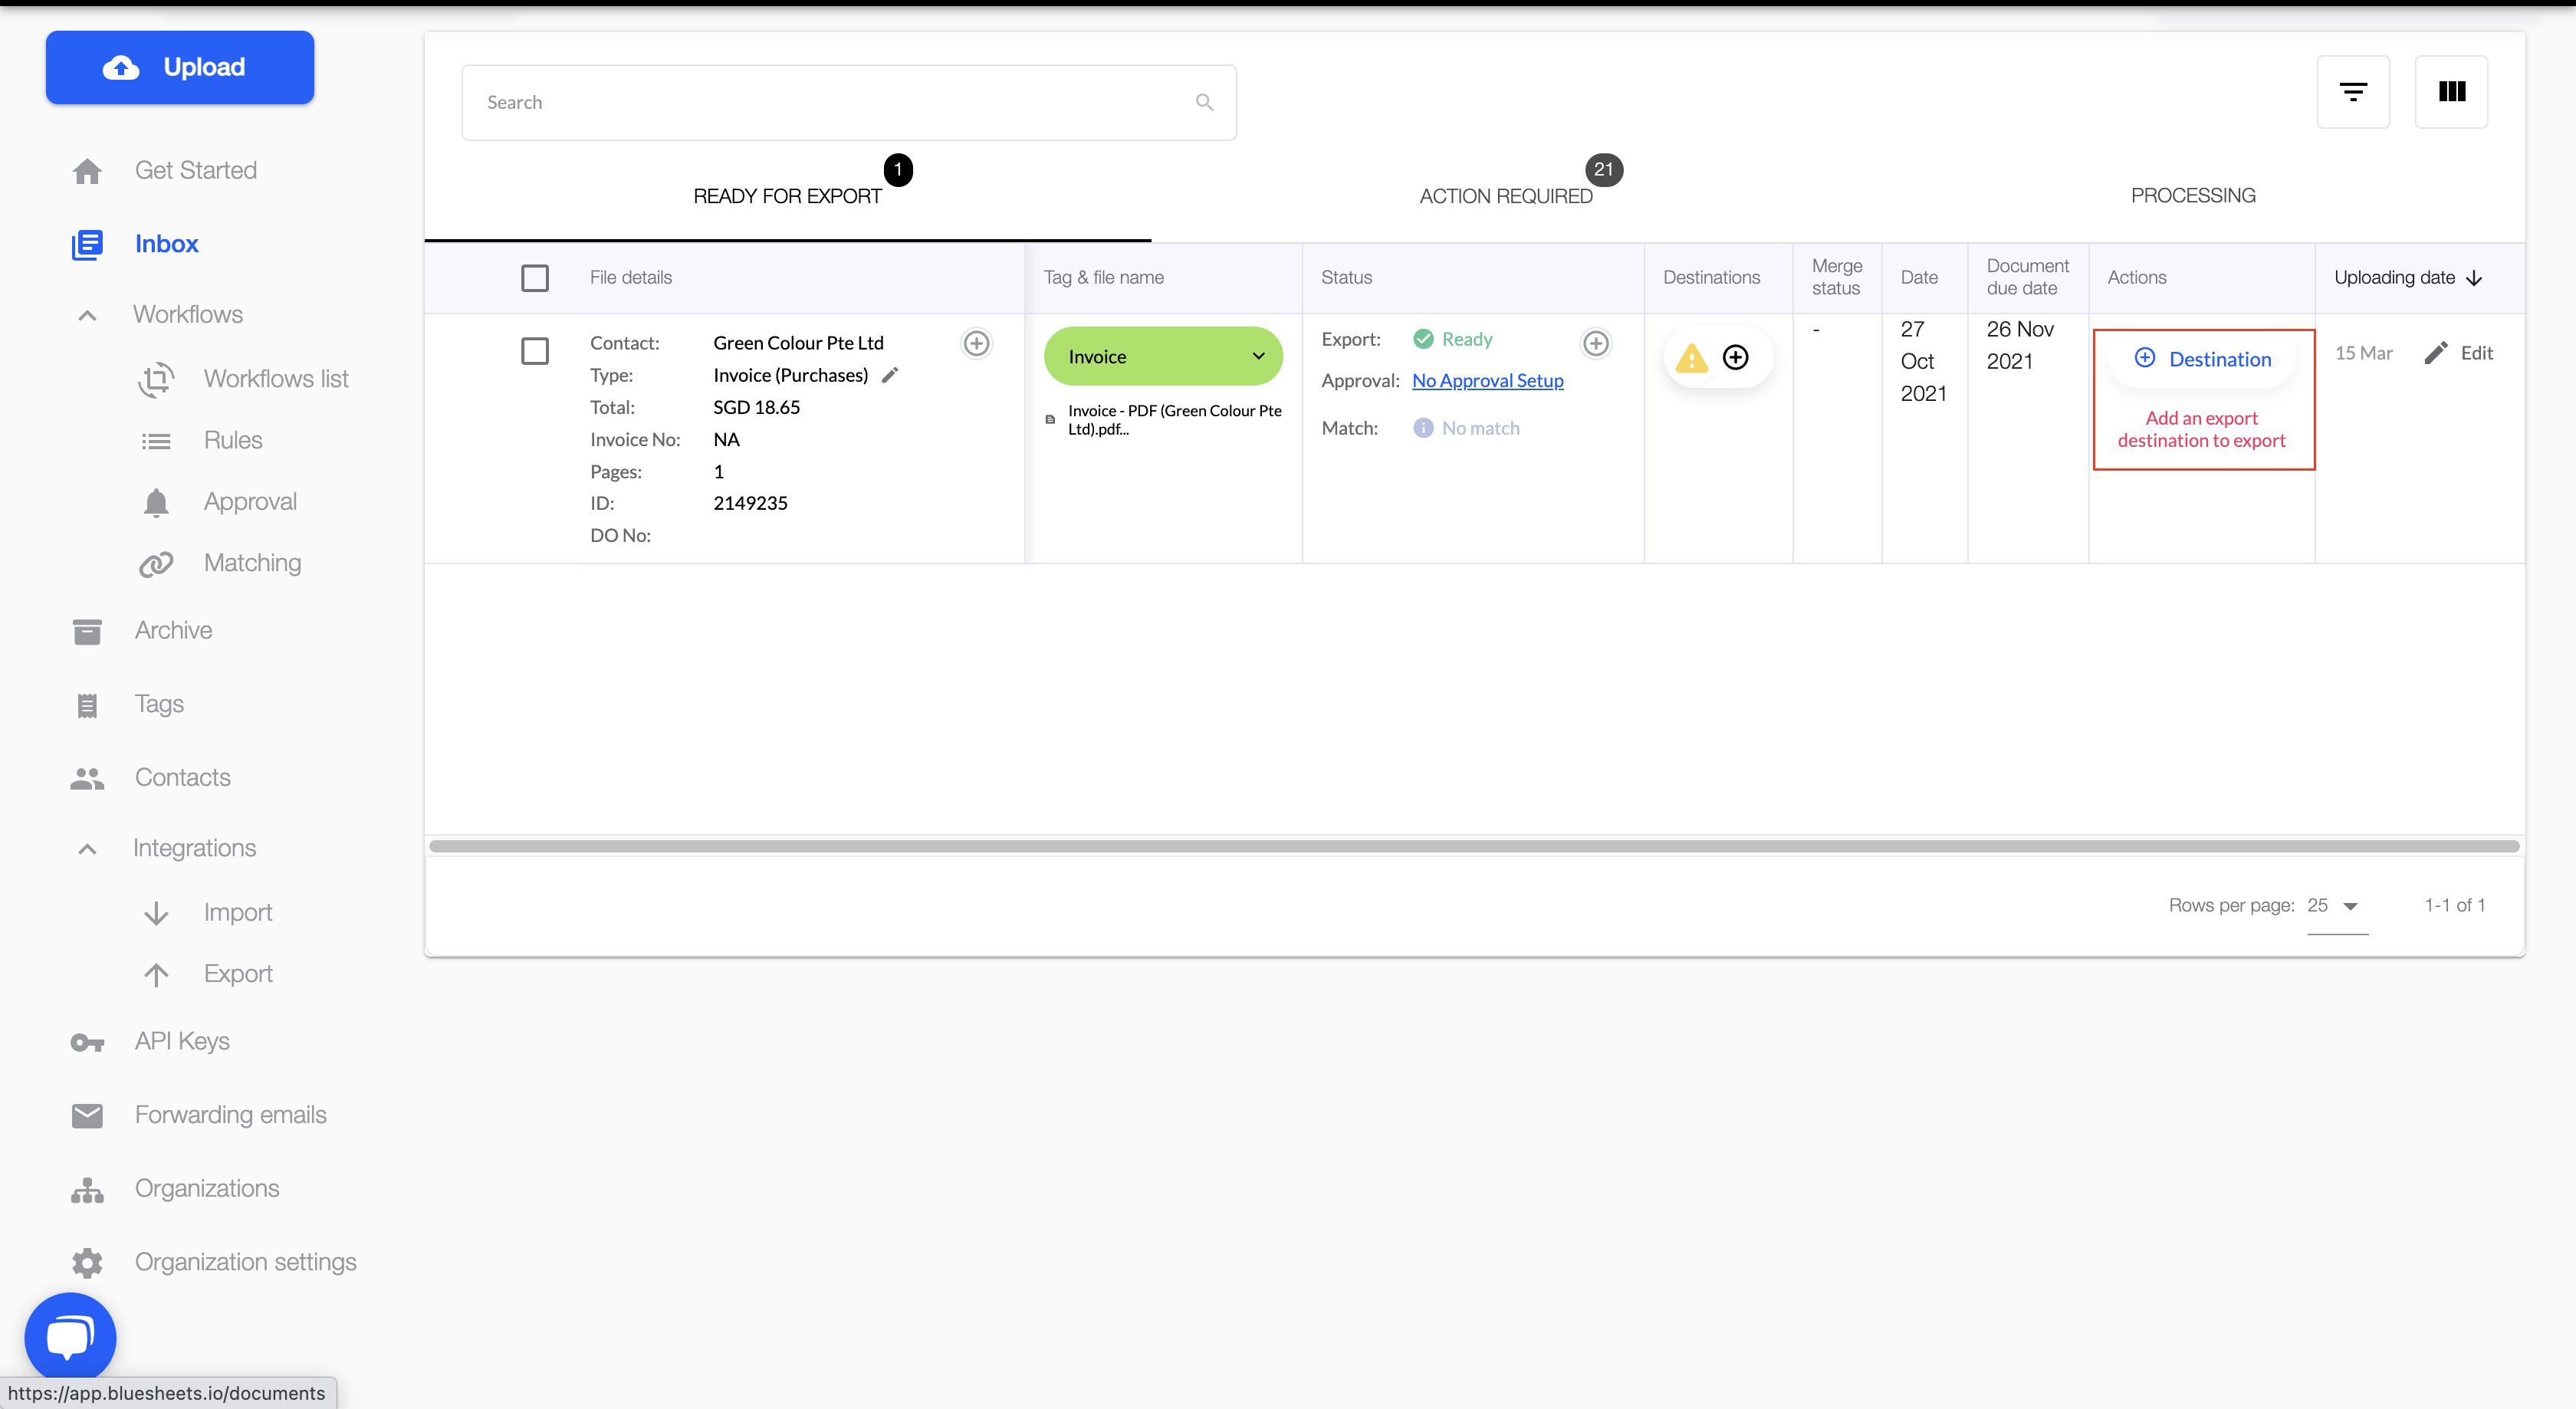
After uploading your document to bluesheets, you will see a Automate export if a rule was created for you.

Once you have clicked into Automate Export, you will be shown the rule for your confirmation.
Once checked, you can click Save rule & export.

Bulk rule creation
To bulk create rules automatically, head to Workflows > Export Rules > Auto Rule Creation


Manual rule creation steps:
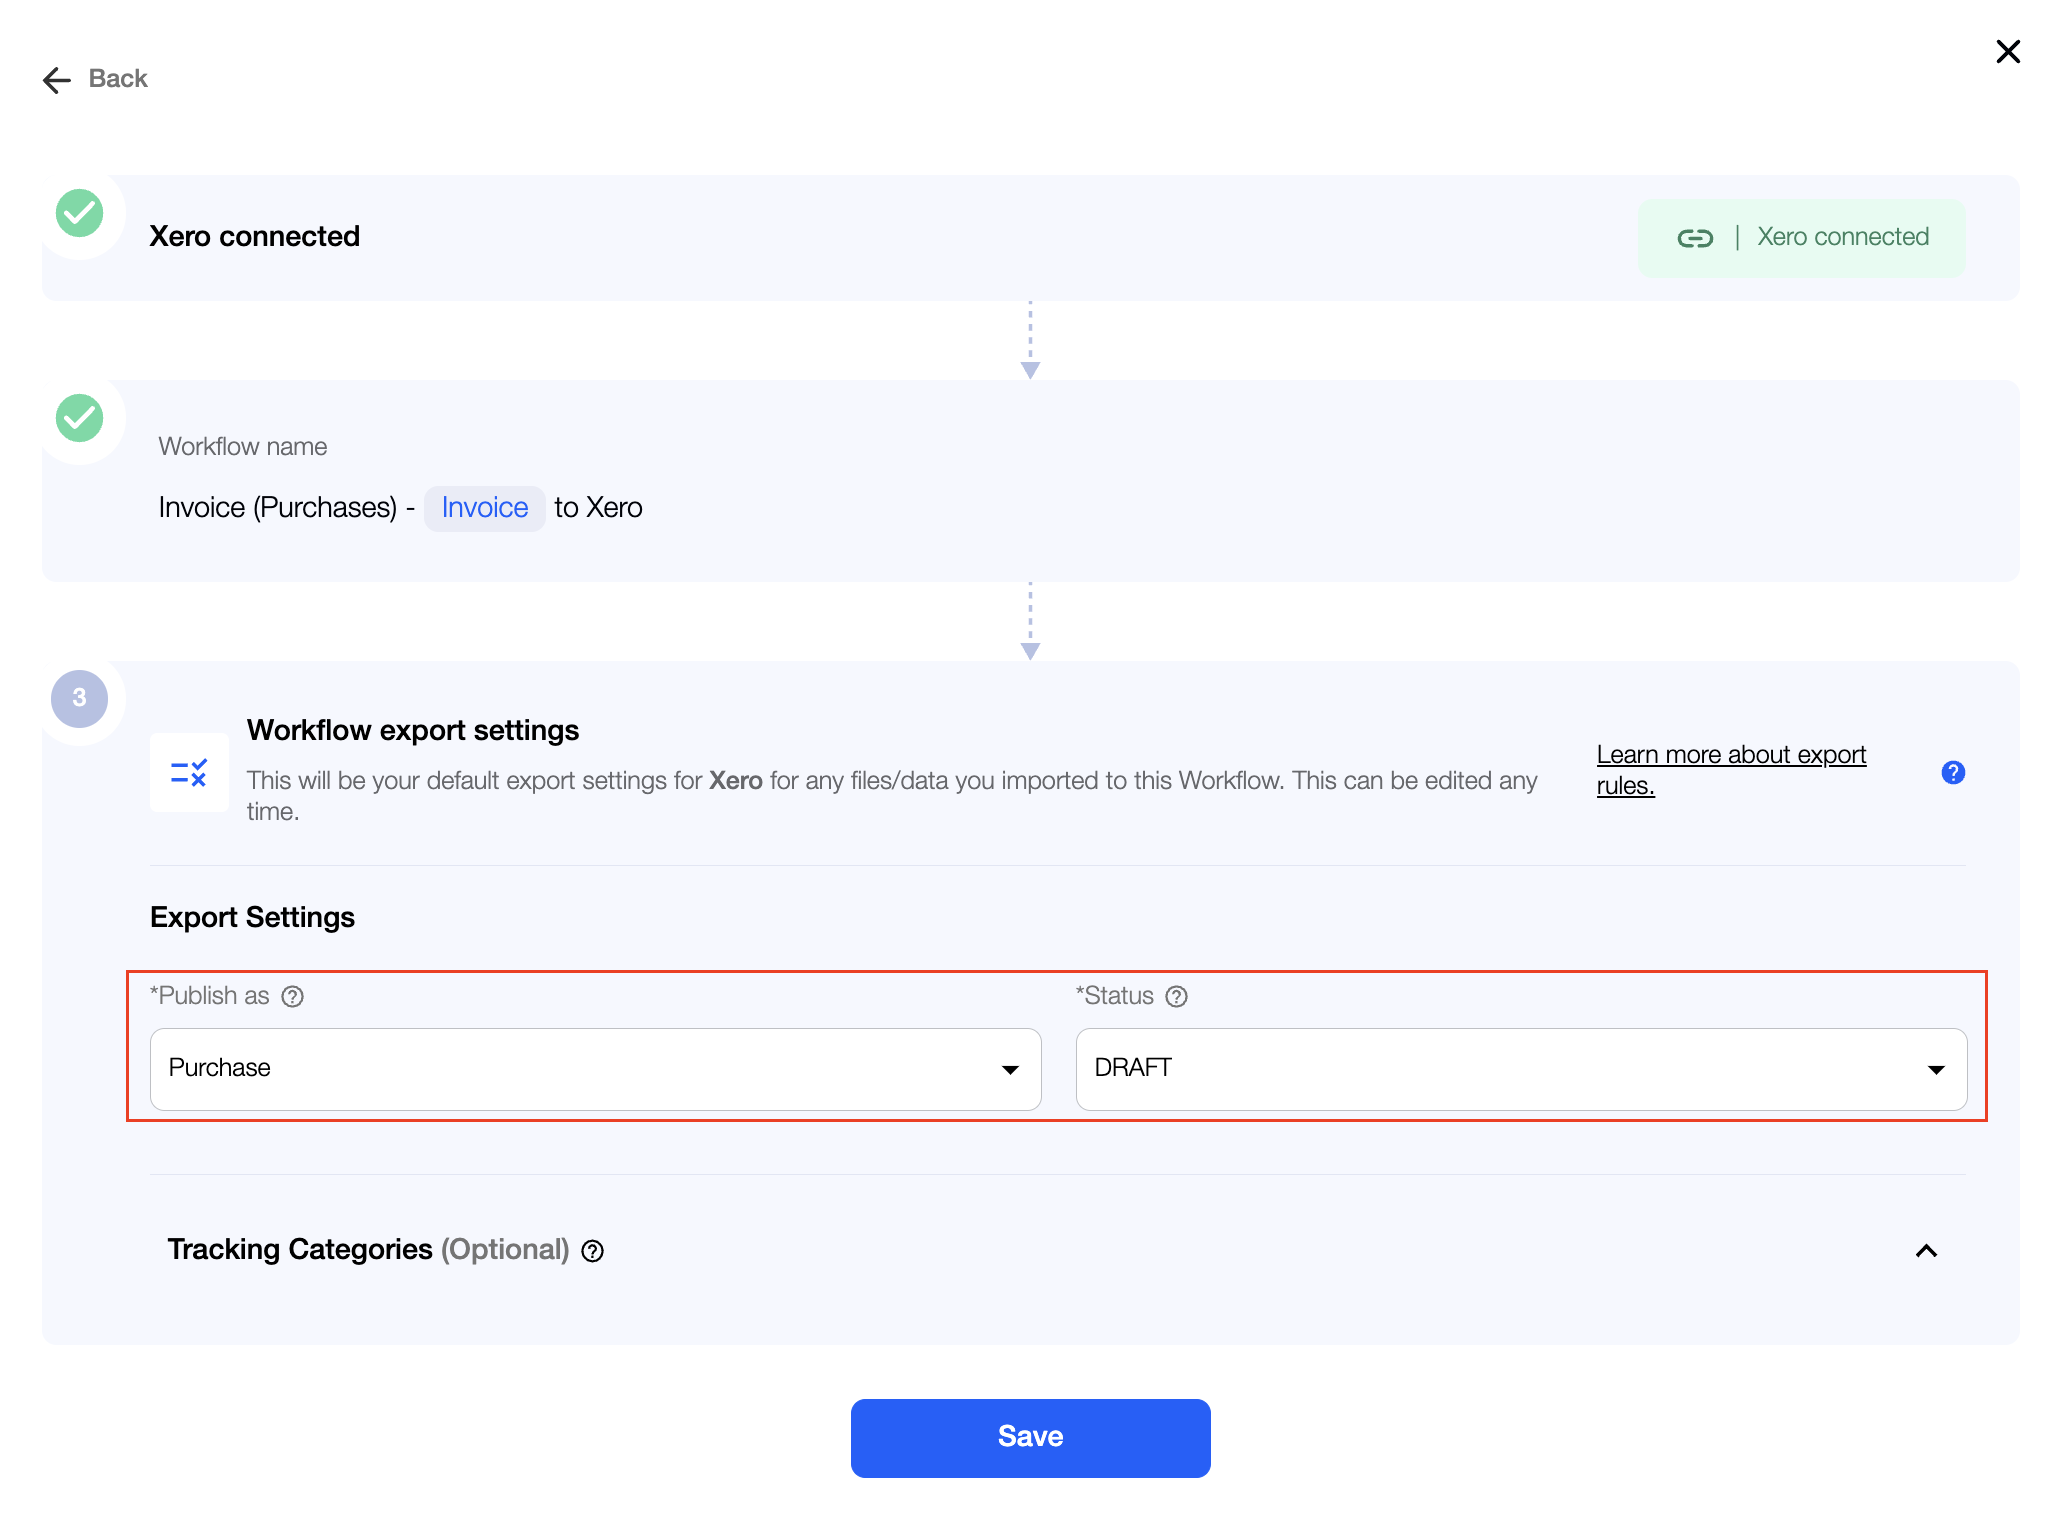
1. Ensure that your Xero account is connected in bluesheets
- To check if your integration is on, click into Integrations > Export from the left menu, your Xero app should show "Connected" (please see sample screenshot below)
- If your Xero account is not connected to bluesheets yet, click here for a step-by-step guide to set the connection up

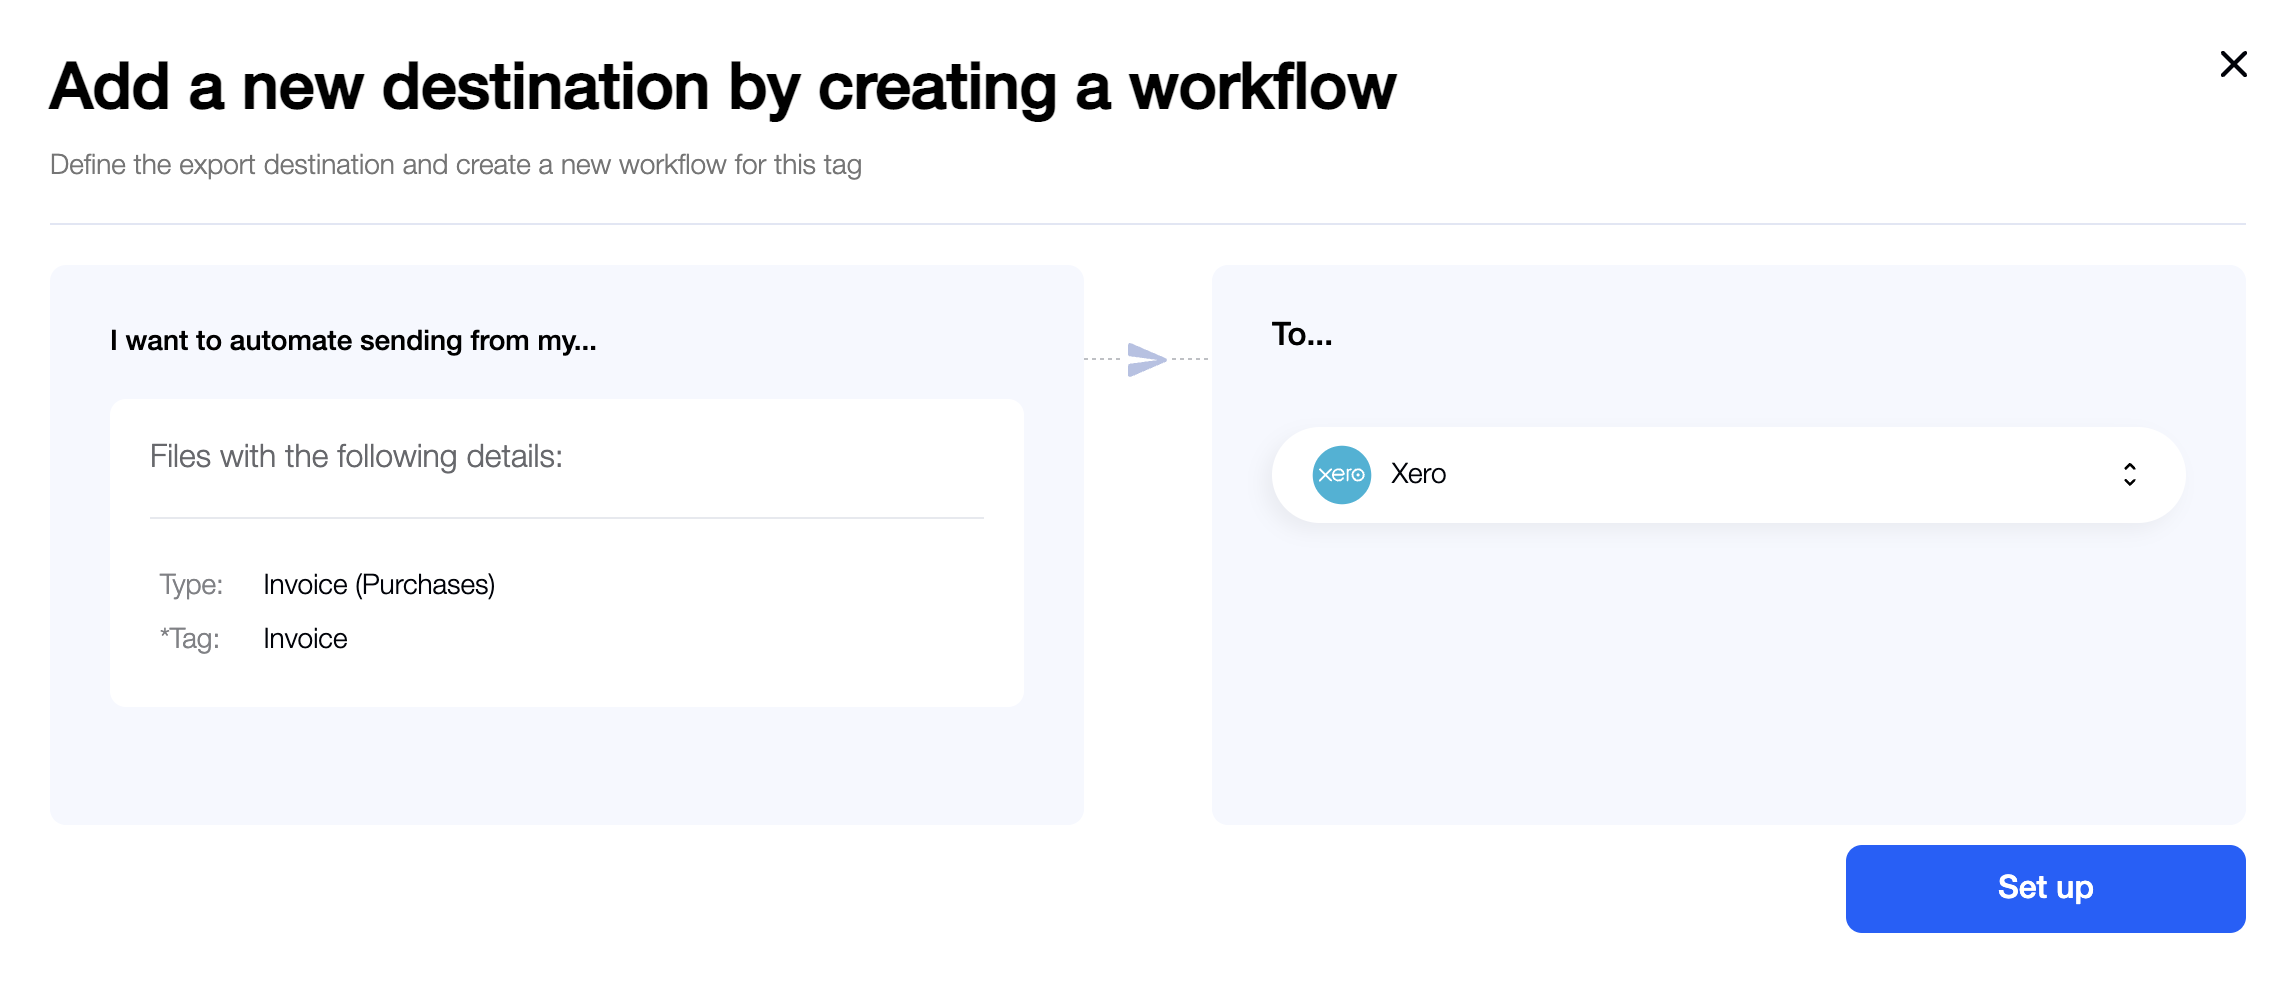
2. Create a Workflow for your selected document
- Select "Xero" as your Export Destination
- Set up your Workflow Export Settings (This determines how your documents are posted into Xero)
- Publish as Purchase, Credit Note, Invoice (Sales) etc
- Status as Draft, Authorised, Submitted or Paid
3. Create an Export Rule for your selected document
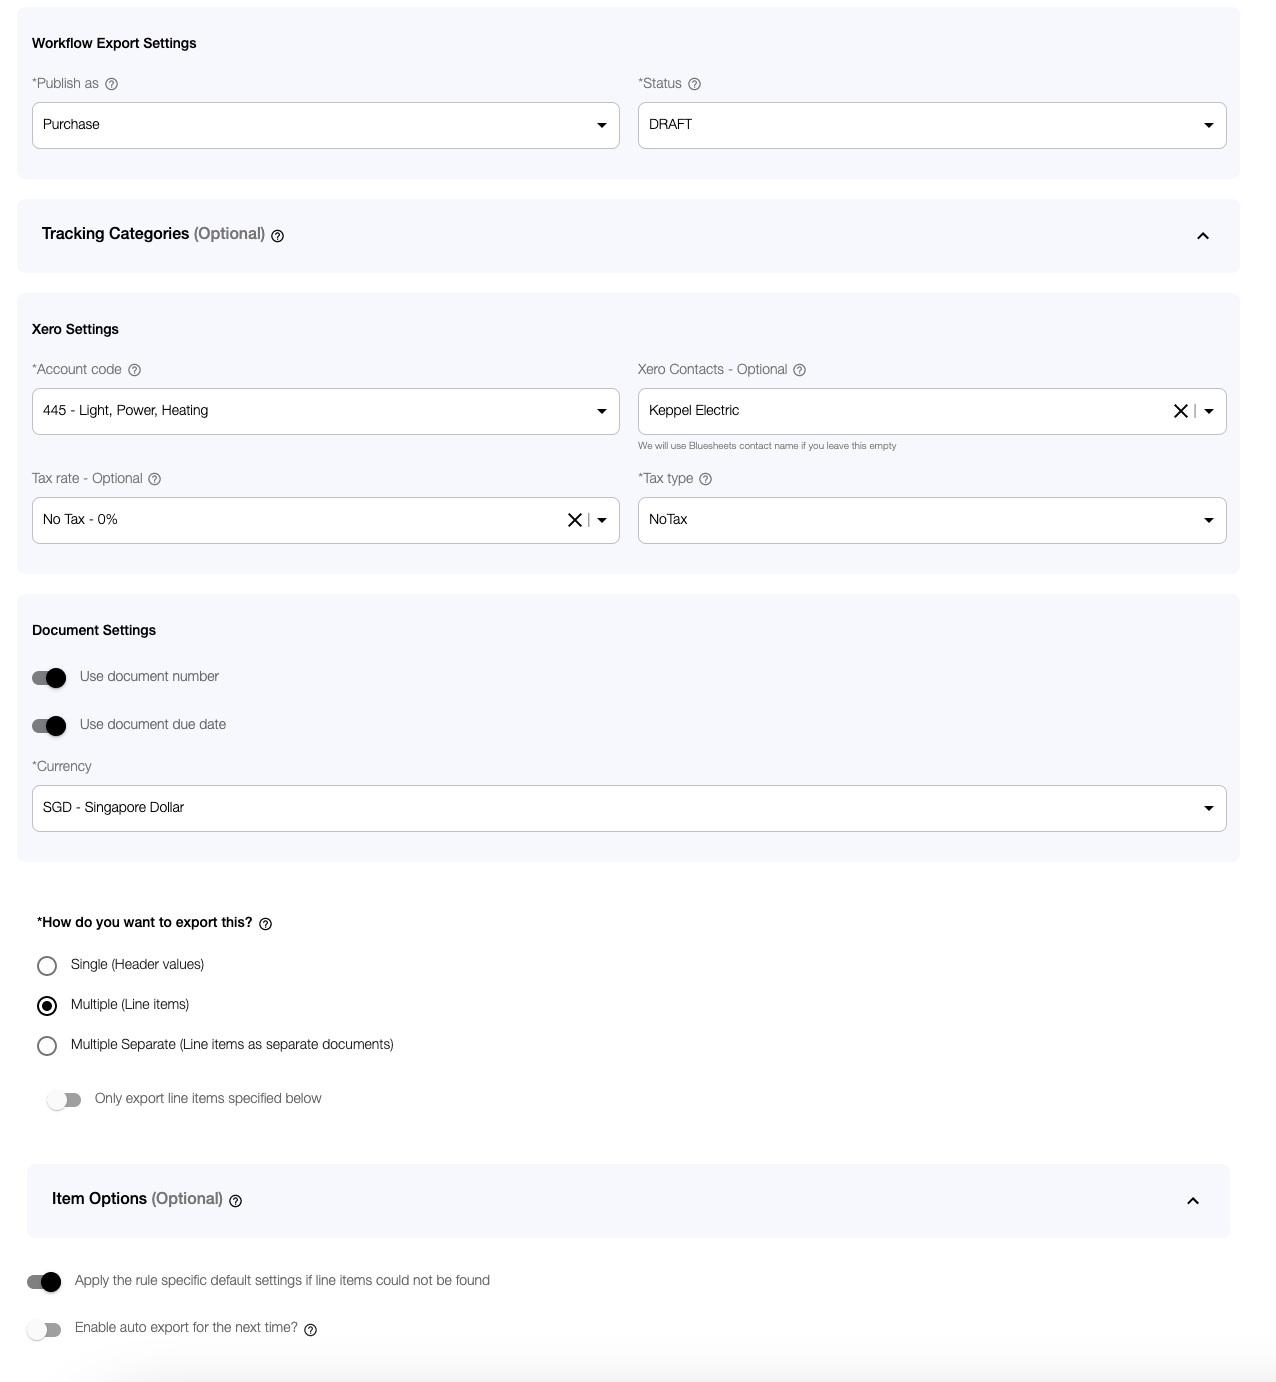
4. Fill in the respective fields accordingly. Fields marked with * are compulsory.
a) Workflow Export Settings (auto-applied from your Workflow creation in point 2)
- Publish as*
- Status*
b) Tracking Categories (optional): Allows you to check how different areas of your business (i.e departments, cost centres and locations) are performing
c) Default Xero Setting
- Account Code*
- Xero Contacts
- Tax Rate: Depending on the type of document, you may want to indicate the applicable tax rate to apply for the document to be exported. This information will be pulled from your existing set up in Xero if not indicated otherwise
- Tax Type*: The rate is specific to the document, do confirm if the document includes tax or it is under a separate line item whereby it is excluded from the total amount
d) Document Settings
- Document number (Default): Option to use document number as reference in Xero or specify a Document number rule to customise the naming convention

- Document due date*: Option to use due date from invoice or specify number of days before payment is due
- Currency*: Select the applicable currency for the data to be exported to Xero
e) "How do you want to Export?" Settings*
This refers to how you want the document to be posted in Xero. You can choose from posting just the top-line data (Total) or the individual line items as one entry in Xero or for the individual line item to be posted as separate entries in Xero
- Single (Header values): Only the "Total" value data is exported
- Multiple (Line items): The full output of all the line items are exported
- Multiple Separate (Line items as separate documents): The full output of all the line items are exported and each line is exported as a separate entry in Xero
f) Item Options (optional): Allows you to assign different account codes to different line items within a document
- Rules specified under Item Options will overwrite the default Xero account code setting
g) Create Rounding Figure/Error (optional): To account for variance between Invoice Items and Payment Items
- Most commonly used for Sales Invoices
h) Description Customization Settings (optional): Allows you to customise your description column reflected in Xero
Default Setting - "Apply the rule specific default settings if line items could not be found"
- Toggle this function should you wish to send in entries that are not specified in the item options
Auto Publish - "Enable auto export for the next time"
- Toggle this function should you wish to export subsequent documents that match the same supplier and workflow automatically